Turning a photograph into a cherished piece of wooden art is an enchanting process, made accessible and popular through the wonders of Mod Podge. This crafting technique, celebrated for its simplicity and heartfelt output, has captivated a vast audience, evidenced by the millions of enthusiasts eagerly watching online tutorials to master this craft.
The allure of picture-to-wood transfers lies in its ability to blend the digital with the physical, transforming a beloved image into a tangible, textured piece that can adorn any room, desk, or gallery wall. The process is straightforward yet rewarding, inviting crafters of all levels to partake in the creation of something truly personal and unique.
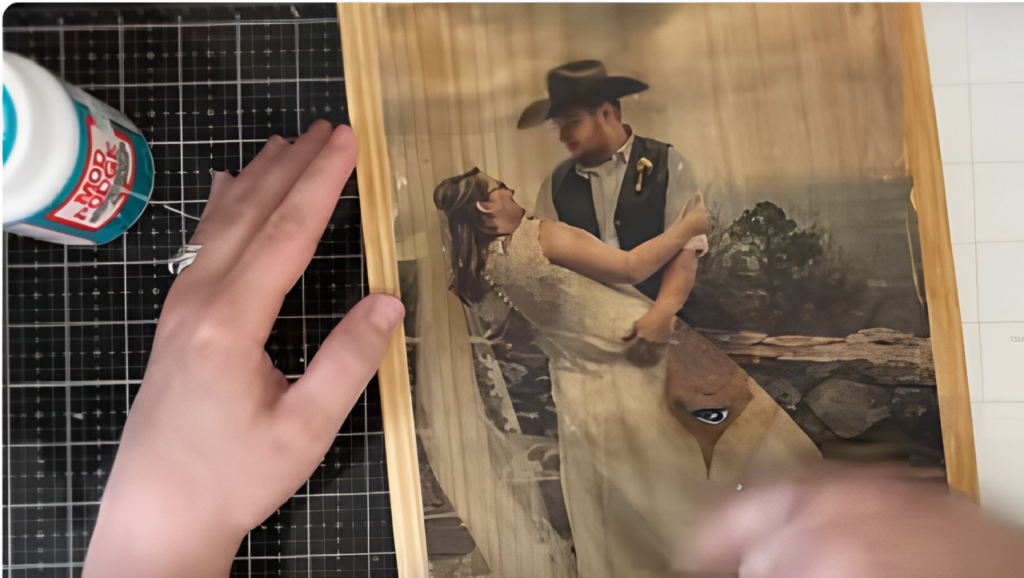
Creating a photo transfer to wood using Mod Podge involves specific techniques to ensure a successful outcome. Here’s how to approach this project with a focus on the technical aspects:
- Image Selection and Preparation:
- Choose a high-resolution photo for clearer results.
- Reverse (mirror) the image using photo editing software to ensure it appears correctly when transferred.
- Printing the Image:
- Use a laser printer to print the image on regular paper. Inkjet prints may smear when wet.
- Remember that white areas in the image will become transparent, showing the wood’s color and grain.
- Wood Preparation:
- Select a piece of wood with a smooth, light surface for best results. Woods like birch or maple are ideal.
- Sand the wood surface to remove any roughness or imperfections, which can affect the transfer quality.
- Applying Mod Podge:
- Apply a generous layer of Mod Podge to the printed side of your paper.
- Carefully place the paper, Mod Podge side down, onto the wood. Smooth out any air bubbles or wrinkles using a flat tool or credit card, working from the center outward.
- Drying:
- Allow the Mod Podge to dry completely, which typically takes several hours or overnight. The drying time is crucial for a good transfer.
- Removing the Paper:
- Once dry, moisten the paper with water and gently rub it off with your fingers or a soft cloth. This process reveals the transferred image beneath.
- Finishing Touches:
- Apply a final layer of Mod Podge over the image to seal and protect it. This layer can be matte, glossy, or satin, depending on the desired finish.
- For added texture or an artistic touch, some crafters use Photoshop filters (like brush strokes) before printing the image. After transferring, they manually add brush strokes with Mod Podge to enhance the hand-painted effect.
- Troubleshooting:
- If bubbles form under the paper during the transfer, they can be gently pressed out before the Mod Podge sets.
- Deep wood grains or knots might interfere with the image transfer and should be filled with wood filler and sanded smooth before starting the process.
By following these technical steps, crafters can successfully transfer photographs to wood using Mod Podge, creating personalized and lasting art pieces.